11th Doctor Corset
I liked the subtle pattern on the Eleventh Doctor’s early shirt – all those tiny burgundy swirls – so when someone posted a Spoonflower link to be able to get the fabric on the DWCosplay community on LJ I knew I wanted to do something with it. However I can’t sew and shirts look terrible on me anyway. So I came up with the idea of making a corset. Well, not actually making a corset, but covering an existing corset with the fabric.
Stuff used:
- Cheap but real corset (I got a white under-bust one from Corsets Boulevard on eBay for £30.)
- 1 yard of fabric
- 2 metres of thin burgundy satin ribbon
- 2 metres of inch wide burgundy satin ribbon
- Newspaper
- Scissors
- Sharpie
- Hot glue gun
- Crop A Dile (love this thing – great for adding steampunky eyelets to stuff)
I started by using the newspaper and sharpie to make a template of each of the panels of the corset (bone to bone, with a half inch overlap on the sides and an inch top and bottom). Then I pinned the template to the fabric, making sure to having the pattern running in the right direction on all the panels (very important!), and cut the panels out.


Then I glued each of the panels to the corset, just along the boning line and flapped over onto the inside but not all over the centre of the panel. I tried to get the fabric taught, but not tight, so it wouldn’t ruin the smooth line of the corset when cinched. I trimmed any excess from the fabric panels if they were too wide, but I didn’t go mad with getting it exact as these joins will be covered with ribbon. I also tried to match the pattern up between the panels. This didn’t always work because of the curving shape of some of the corset panels, but it’s not that visible where the pattern deviates a little.


On the front, I cut the fabric so I could wrap it around the hooks and neatened it up as much as I could. It’s far from perfect but it only shows if look you quite closely. For the posts, I used the Crop A Dile to make small holes (could use a hole punch or anything else that can make a clean, small hole) and simply pushed the fabric over them.

For the back I ummed and ahhed, but then decided not to try and work out how to cut the fabric for the eyelets. I simply left a white strip on each side which, when the ribbon is applied, happily looks like a feature and not the laziness that it really was.


Then I glued the thin ribbon over the joins between the panels. This was a little tricky as the glue wanted to squish everywhere, but patience and steady hand worked.


To finish it off I glued the wider ribbon on the top and the bottom to make a neat edge, simply folding it over. For the corners at the front and back, I cut out a little bit of the ribbon so I could fold it into a neater corner.
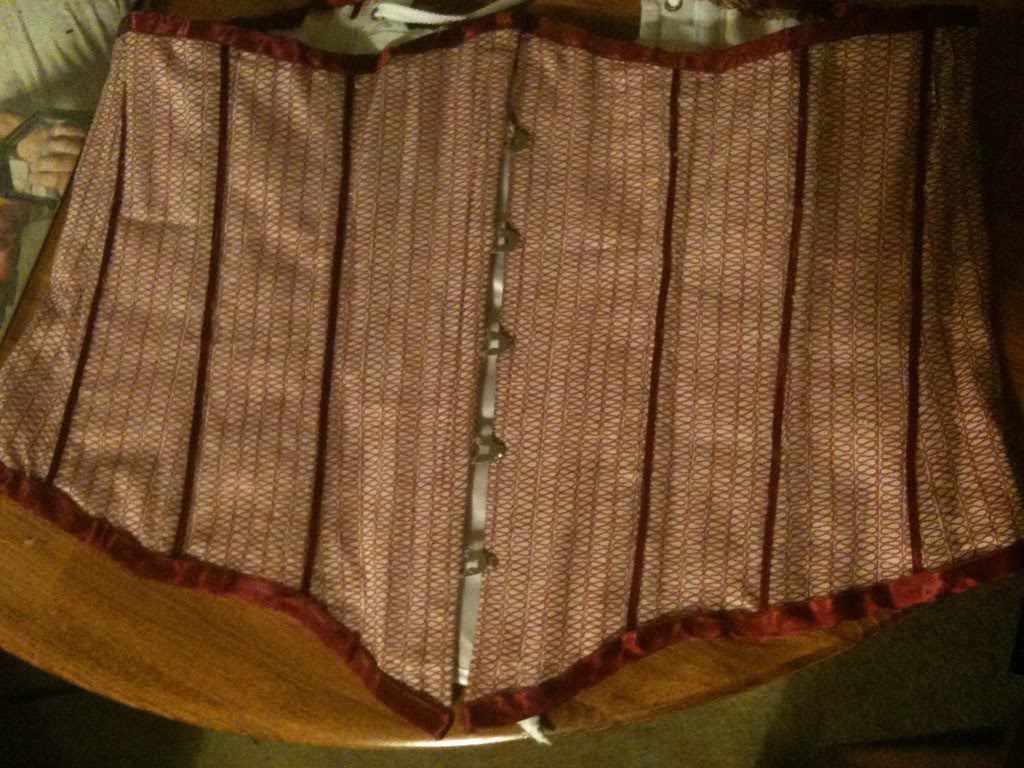
Here’s the finished article:

It’s not perfect, but I think it’s not too bad for a first attempt. Next try with this technique will probably be steampunky and I’m going to experiment with different glues.
Sadly, I’m not able to go to the 11th Hour convention next weekend, so I’m going to have to find somewhere else to wear it…